TUTORIALS
Setting up your printer for different label sizes
To print Amazon barcode labels, you'll need to do two things:
- 1) Set your label size in your Scan & Label account. Click HERE for instructions.
2) Configure your printer for your label size following the instructions below:
If you have a Dymo printer, then most label sizes are automatically available. You just need to select the correct paper size when you print.
If you are using a printer other than Dymo, you'll probably have to specify the label size. Don't worry, here are some easy steps to follow:
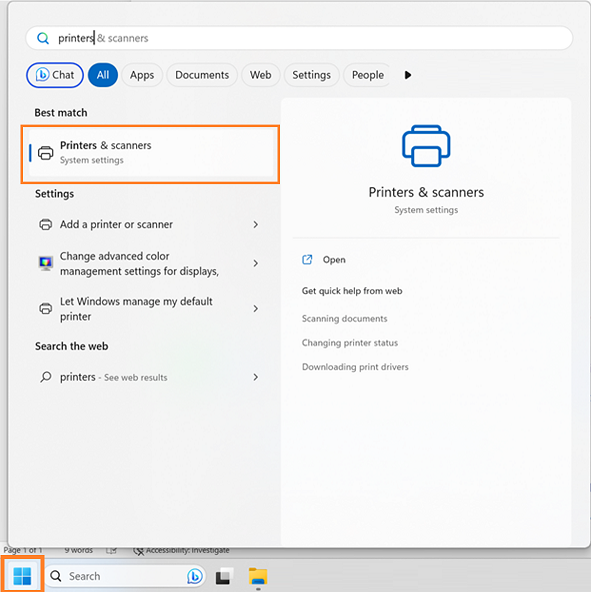
Click the Start menu, type the word 'Printers', then click 'Printers & scanners':
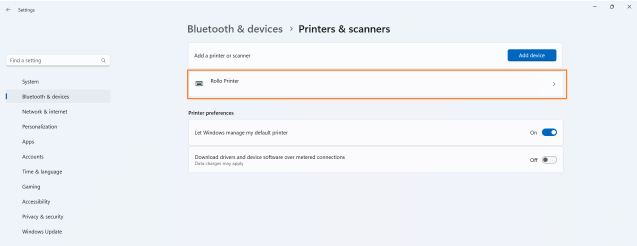
Click on your label printer:
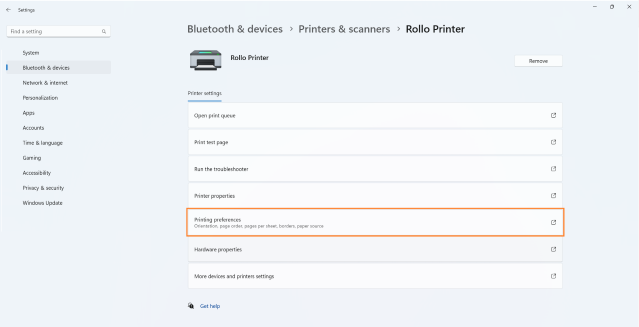
Click on 'Printing Preferences':
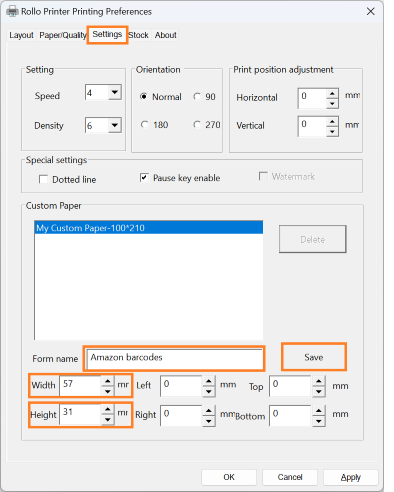
Click on 'Settings', enter the Width and Height in mm, enter a descriptive name, then click Save:
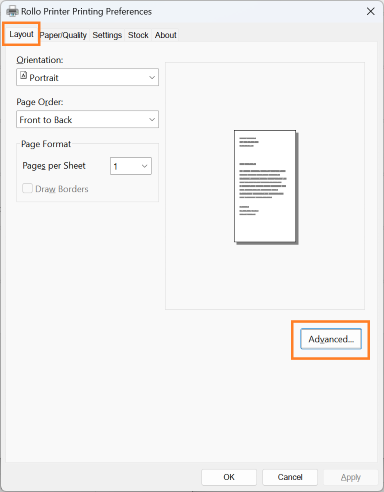
Click on the 'Layout' tab and then 'Advanced'.
Select your new label size next to 'Paper size' and click OK to set it as the default:
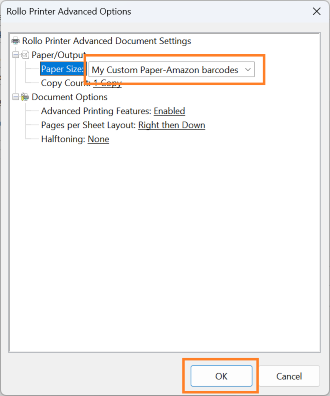
Click OK to close the window.
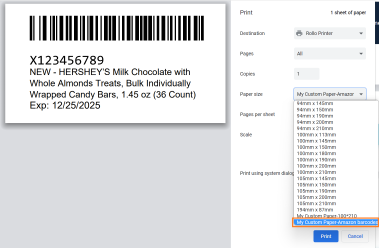
When you print your labels, the label size should be selected by default. If it isn't, then click the dropdown next to 'Paper size' and select the label size you just created.
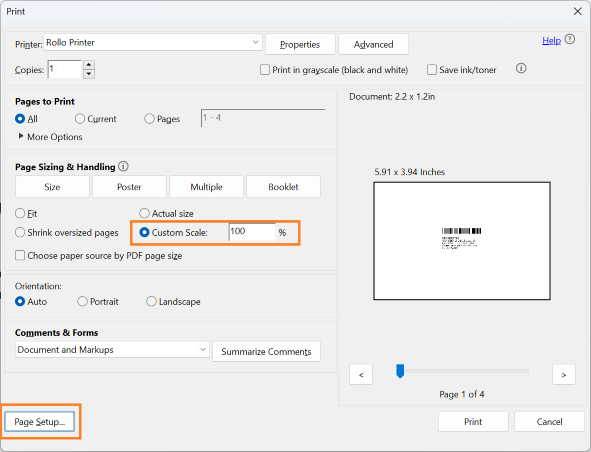
Or if printing from Adobe Reader, set 'Custom Scale: 100%' then click 'Page Setup' and select your label size next to 'Size':